Loading... Please wait...


I'm new! I'm looking for a trainer kite...
I'm looking for a beginner, entry-level power kite for...
I'm looking for a board...
- Home
- Kiteboard
- Learning Center
- How To Begin

Categories
Shop by Price
Brands
Current Top Sellers
-
$279.00

-
$389.99$379.99
-
 $349.99
-
$348.50$345.50
-
$229.99$218.49
How To Begin

4 Steps to Begin Kiteboarding
 Kitemare.com, by far, is the best website available to help you get started right. The steps to getting started are mostly the same for all of the various kiting sports:
- kite-boarding / kite-surfing
- snow-kiting
- wave-kiting
- kite-landboarding
- kite-skimming
- kite-buggying
- kite-skating
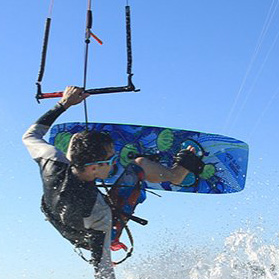
Step #1: Get a Trainer Kite and Master Your Basic Kiting Skills.
Trainer kites are small (2.5m to 3.5m) and designed to be flown on the beach, in a field, or any a wide open area.
Your first goal is to master the kiting basics and learn about the wind window. No board, only the trainer kite.
In the beginning... it's ALL about the kite.
Trainer kites are the easiest way to learn your kiting skills. Just read the included manual, watch a good instructional DVD, and practice the exercises on our "How To Use Your Trainer Kite" page. Doing this will help you master the foundational skills to kite flying and accelerate your progression into the sport of kiteboarding and snowkiting.
Learning good kite flying skills with a trainer kite before taking lessons will save you money and a lot of frustration.
So get a trainer and practice..practice...and practice some more.
* The number one goal of a trainer kite is to help you safely learn and master kite flying skills. Any trainer kite between 2m & 3.5m is a great choice. The recommendations above are only general, but you may decide you want a more challenging or less challenging kite. The smaller the kite the less the pull. Also if you're more athletic and competitive in nature, you may enjoy the larger size kites.
Step # 2: Learn Board Skills (or sharpen the skills you already have)
Wakeboarding skills directly cross over to kiteboarding.
Surfing, snowboarding, longboarding, mountainboarding, and skateboarding, are all good ways to build board skills. The preferred method is to learn to ride a wakeboard behind a boat, waverunner, or at a cable park.
If you live in snow country with a goal of learning kiteboarding (on the water) you'll want to spend more time on a snowboard rather than skis.
If it's too cold or water isn't your thing, hop on a skateboard or mountainboard ATB (all-terrain board) to learn or tune-up your board skills.
Practicing "board sports" of any kind is strongly recommended. Doing so allows you to focus only on board technique without having to think about the kite.
Step #3: Take a Lesson
Warning. Do not fly a full size kite without proper instruction and lessons!!!
Kiteboarding, just like paragliding, sky-diving, and scuba-diving can all be reasonably safe sports and easy to learn, if you get proper instruction and "think" before you act.
Q: Any idea of what happens if you go scuba diving and don't blow bubbles while you're headed back up to the surface?
A: Your lungs explode and exit through your ears.
Q: What about the consequence of pointing a hang-glider's nose too high?
A: The glider stalls, and then you fall from the sky like a rock.
Q:What if you steer your kite too quickly across the sky?
A: In this case, if you're not prepared for the surge, you'd better hope there are no hard objects downwind of you as you get yanked and spanked by the full power of the kite.
Make sure you have a wide open area without people to fly your kite. IF you live on a COMPLETELY deserted beach and YOU choose to risk YOUR own LIFE, that's OK!...It's your business, just NEVER put other people, or our beach access, at risk.
To learn more, check out our lessons learned the hard way.
Step #4: Get Hooked Up with the Best Kiting Gear for Your Needs
During your lesson you can either use the gear owned by the instructor or training school or bring your own gear. Find someone that specializes in kiteboarding and buy gear that's right for YOU.
We see too many beginners buying inappropriate gear that they initially "thought was a good deal" ...and later learned that it was not an appropriate design, size, or price for their needs. If you have questions, we would be happy to help.
Kitemare was created by kite instructors to educate visitors like yourself to help you get started right. It seems that the goal of most sites is only to zap your credit card.
Our goal is to educate you first, and then assist you with buying only the gear you need. When you're ready .. we have it: kites, bars, lines, boards, harnesses, and more.
It's ALL here but first things first: "Learn Safe!"
-
Make smart choices, not cheap ones.
-
Buy quality gear at a quality price with a quality satisfaction guarantee.
This site is loaded with valuable, detailed kiteboarding information with the hope that you'll take to time to learn the right way.
In Summary
Step 1. Get a trainer-kite and practice
Step 2. Learn or tune up your "board skills".
Step 3. Take a lesson
Step 4. Buy the right gear for your needs. (kite, bar w/ lines, leash, harness, board)
When researching a new sport like kiteboarding, it's normal to have questions. No worries... We're always happy to help. Yes, Really!
Let's go. Next stop...